Showing posts with label Cooking. Show all posts

Wednesday, January 6, 2010

Just HAD to share!

So, I haven't cooked a "from scratch" meal in a couple of weeks because.. well, I've been busy and tired and getting home late and out of town and any other excuse I couldn't come up with off hand.

Thankfully it doesn't take much to satisfy B, so I'm usually ok if I decide to take the night off and just make grilled cheese.. or even worse, ask him to make pancakes--because pancakes have always been the job of the dad in my house, and even though he's not a "dad," I still like for him to do it!

Monday night I went out to eat with some of my YoungLife girls, and when I got home, I found my poor little husband eating oatmeal for dinner (which he was happy about). So I decided I needed to plan out our meals for the next few nights.

For Christmas, my Aunt got me one of my most desired gifts...

Ignore the produce bag and just look at the cookbook. If you don't know about Ree Drummond, AKA The Pioneer Woman, you should. She is a very talented woman, and I just love reading her blog--but don't worry, so do thousands of other people! Well she just came out with a cookbook about 3 or so months ago, and I've wanted it so bad! Then she went on a 6-week book signing tour and I almost called in sick to work to drive to Dallas and go. But thankfully, my Aunt Lynn went for me... and my mom, and my sister, and who knows how many other people, but I'm so excited about it!

and yes, you can be jealous that mine is personalized and autographed.. If you want to read about PW's stop in Dallas, and see a picture of my Aunt Lynn on PW's blog, you can go here, my Aunt is the lady in the second picture, and now she's famous!

So back to my story about my lack of cooking..

Last night I had planned on making pork chops, but I had a little extra time so I decided to make my first thing out of PW's cookbook: Pizza and it was DELICIOUS!

I hadn't planned on taking any pictures, or even sharing any of it with you, but it was so good that I just HAD to!
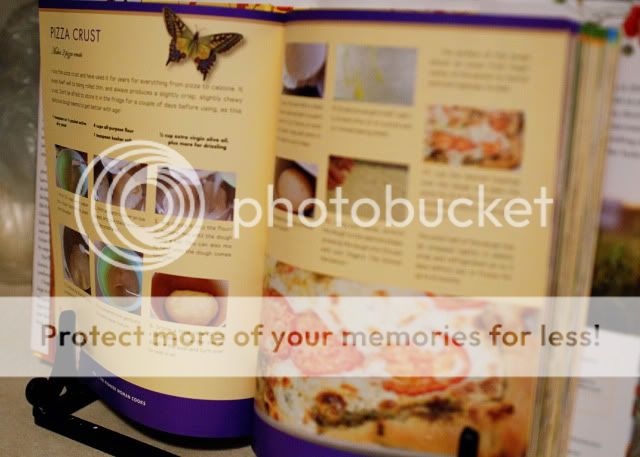
This is also the first time ever for me to use this cookbook stand.. I usually just lay the recipe on the counter.. or better yet, put it on the fridge with a magnet!

So I started with the crust. I've never made pizza from scratch before so I wasn't sure if my tiny little kitchen could handle it, but it was surprisingly easy!

I whipped out my lovely KitchenAid Mixer (that I have yet to use before last night) and had to find a place to plug it in. I have only two plugs in my kitchen, one for the fridge and microwave, and one for the coffee maker, toaster, and small convection oven (we have to alternate). I opted to unplug the microwave because it's the only plug close to an actual counter top and luckily I discovered my mixer fits sideways in front of the microwave--you have to get creative when you don't have much space!

I got to making the dough (I halved the recipe)
2 cups flour
1/2 tsp active dry yeast
3/4 cup warm water
1/6 cup olive oil
1/2 tsp kosher salt

Put the water into a bowl or (like me) larger measuring cup and sprinkle in the yeast.

Then combine the flour and kosher salt into another bowl (or your mixer bowl) and turn mix with an electric mixer on low speed.

Once the dry ingredients are all mixed up, drizzle in the olive oil.

Then, using a spoon, stir the water/yeast mixture really well and slowly add to the flour mixture.

Let the mixer run until it all combines to form a ball.

Now grab a clean bowl and drizzle it with olive oil. Once you've done this, place your ball of dough into the oiled bowl and flip it over to coat it with oil.

Place a moist towel over the bowl and store it in a warm dry place for 1-2 hours.

After you've let it rise a little, take your sheet, in my case just a small cookie sheet or you could use a pizza stone or whatever, and drizzle it with olive oil.

Place your dough on the sheet and use your fingers to spread it out to the desired thickness being sure to make the surface bumpy to receive your toppings.

You can really add whatever toppings you want here, this is just what I chose.
Put on a layer of pesto and then take slices of mozzarella and cover the pizza. Then add roma tomato slices all over the pizza and cover again with mozzarella and top with fresh grated Parmesan cheese!

When I saw this, I decided I needed to share.

And then I turned around and saw this, and decided I needed to share... I got lucky on this picture because I wasn't even looking!

Then I decided to show you the size of my oven. For a counter top oven, it's great.. but that is literally my only oven, so all baked quantities must be small.

Then I decided to show you this one last time..

And the finished product...

YUM! It was so good, I will definitely be making it again! I can hardly wait to get home for lunch to eat the left overs!

I hope you enjoy it! And Christy, I hope you could make it through without feeling nauseous! (She's 6-weeks pregnant with my little niece or nephew!)

Thursday, September 10, 2009

Colorful Chicken Alfredo

I always hoped I would someday enjoy the art of cooking. I have never really cared that much for cooking before, but it was wedged its way into my life. It all started when Brandon and I were dating and he told me that he "hates" eating out. He would choose a thrown together dinner at home over a 5-star restaurant.

That being said, I hardly ever cooked for us during the dating/engagement process. Lately though, I have come to love cooking. Maybe it's the idea that I am able to have an impact on how healthy we eat when I cook, who knows? Regardless, I love it now and I'm always looking for a good recipe to try and this one is no different! I got this recipe from one of the blogs I frequent, Kevin and Amanda, and I used her pictures for this (she had good daylighting and the sun starts to set earlier these days, I was only able to come away with about 4 good pictures of my own.. when we buy a house with a bigger kitchen, I'll be more inclined to take more pictures). I had this recipe printed out and on my desk for two weeks waiting to make it, and it was well worth it!

This dish is SO good. The colors and flavors are just amazing together. It's so fun to make and smells delicious

First off you'll need the following:

1 lb chicken breast - I used boneless, skinless because that's what I had, but she used bone in so you can do whatever you prefer
9-10 bouillon cubes (or 3 tsp bouillon granules if you don't like to peel the wrappers)
2 cups farfalle pasta
1/2 cup reserved chicken broth
4 tbs butter, divided
1 cup half and half
1 clove garlic, minced
1/2 cup grated parmesan cheese
1 red, 1 yellow, and 1 green bell pepper
6 leaves fresh basil
salt and pepper

Start by placing the chicken and the bouillon cubes (or granules) in a large pot with 2 quarts of water and bring to a boil. Let simmer over Medium heat for 20 minutes.

While the chicken is simmering, take the 3 bell peppers and julienne them, or slice them into small strips.This recipe serves 2-4 people, depending on the serving size, so I only used about half of the peppers. The rest I placed in a plastic bag to freeze for the next time I'll need them.

Aren't the colors so beautiful?

When all the the bell peppers are sliced, and the chicken is done, remove the chicken and place on a plate to cool. Grab your wire mesh strainer and get to straining that chicken broth. You'll only need 1/2 a cup, so you can freeze the rest if you want, but if you're the wife of a hunter, you know that freezer space is limited due to fish and dove breasts this time of year.
After you've strained the broth, you should probably go ahead and get those noodles going with a dash of salt.
Now, place three tablespoons butter and your 1/2 cup of chicken broth in a pot to begin the sauce.

Let the butter melt completely and stir to combine the two. Then add 1 cup of half and half to the mix, whisking periodically. After the half and half, add the minced garlic, 1 tsp salt and 1 tsp pepper and then slowly whisk in the Parmesan cheese. Simmer on medium low heat, whisking occasionally.

Now for the bell peppers, melt 1 tbsp butter in a pan over medium high heat and start the bell peppers. While you're cooking the peppers, go ahead and cut up the chicken that should be cooled by now. Continue to saute the peppers until they are crisp tender like this, but don't forget to stir the sauce!Once the peppers are finished, add the chicken to the skillet and sprinkle with salt and pepper. Then add the creamy sauce to the mixture, turn down the heat and let simmer.
Drain the noodles and place them in a large bowl. Pour the alfredo cream sauce over noodles and toss to combine. If you're feeling fancy, chiffonade 6 leaves of basil and sprinkle them on top. And Viola!
Print this Recipe.

I hope you enjoy this recipe as much as I did!

Tuesday, August 25, 2009

Thanks, Christy!

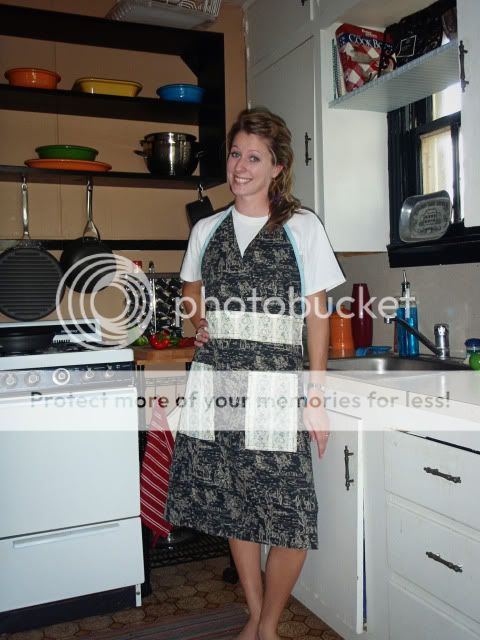
My sister Christy has gotten into sewing lately and she is making some really cute things! For my birthday she sent me an apron that she had made and it's adorable! Last night I wore it for the first time while cooking dinner.

Thanks, Christy! I love it!

Now, on to what I was cooking.. Chicken Fajitas! This is such a good recipe, especially if the only way you've been making fajitas has been buying the pre-marinated chicken.

First, make sure you put on a college T-shirt to celebrate the first day of school that you don't have to go back.. and because all of your t-shirts now consist of college activities. Excuse our old cabinets that don't shut right.. it's a rental so we don't care.


Now, grab some bell peppers. The color is completely up to you, I happen to think that the flavor of the red bell pepper compliments the taste of the chicken perfectly. I add some green in there for more flavor and color, so it's really up to you.

Then cut up an onion. Make sure you cut it into long pieces, because that's what the Mexican restaurants do..

Once you've cut up your onion, place it and the bell peppers into a Zip-Lock bag.

Am I allowed to show you a picture of an actual Zip-Lock bag without their permission? oh, well, consider it free advertising. I like this kind of Zip-Lock because it's bigger on the bottom than it is on the top and it stands up better.

When you have the bell peppers and onion in the bag, it looks like a little Mexican flag. Put on your sombrero and dance around for a minute, then place your cut up chicken in the bag. I used breast tenderloins cut up into inch and half slices.

Now time to add some more ingredients.

First, soy sauce.

That's right, I said it. Soy sauce. You weren't expecting that? I promise it's great!

Now some lime juice.


And some chili powder.. (I'm a wimp when it comes to spice, but this is more flavor than anything)

Now, zip up the bag and shake, rattle, and roll all the stuff around to mix it really well.

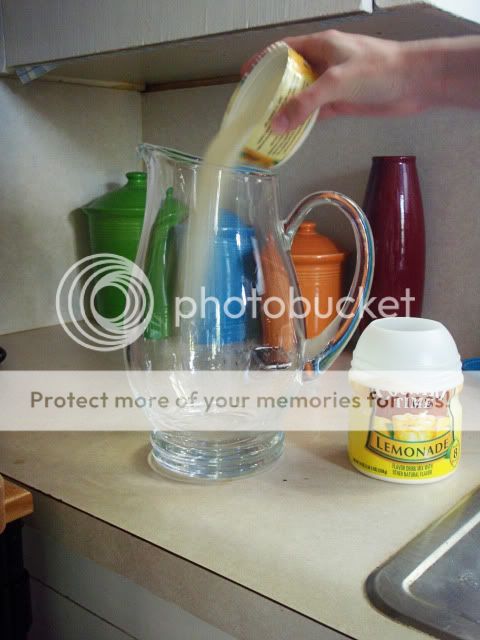
Then let it sit for a few minutes. Sometime I use this time to make Homemade Guacamole, thanks to the recipe passed along from my sister. The guacamole is good, but it makes a mess (without a dishwasher) and I didn't want to have a Mexican food themed week trying to finish it, so this time I made some Lemonade.

After a few minutes, flip the bag over.

I know seeing that makes you thirsty...

Now, back to the cooking. Pour a little oil in a skillet and get it really hot, and I mean really hot. If the skillet isn't hot enough, the chicken will not brown correctly.

Once your skillet is hot enough, open up your bag and fish out some of the strips of chicken. Make sure you have an extra plate ready to put them on when they've cooked thoroughly.

You may have to do two batches of chicken depending on the amount you're cooking and the size of your skillet. There are only two of us, so I'm half-ing the recipe and using a smaller skillet.

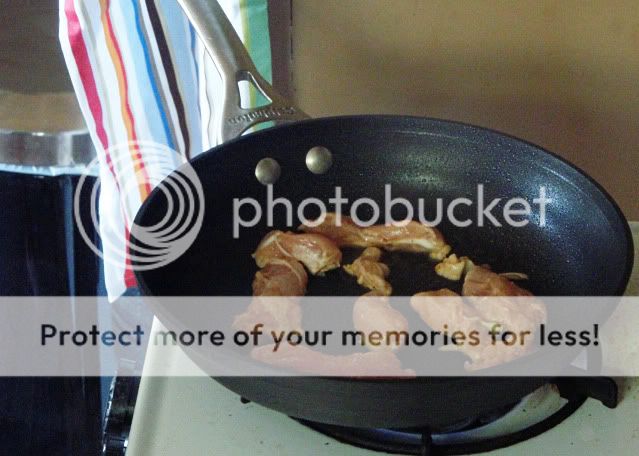
After about a minute, flip the chicken over to cook the other side. If you're doing it correctly, it will smoke just a tiny bit and you will not realize it until you go into the other room, traditional Mexican food style.

Doesn't that look good?

When you've finished the chicken, remove it and place it aside for a few minutes. Add the rest of the contents of the bag to the skillet and get cook them until the vegetables start to become soft.

Once the vegetables have become tender, add the chicken back to the skillet and stir it all up. Turn off the heat and serve immediately.

I like to take the skillet to the table because it's still sizzling like at the restaurants.

I didn't take any pictures of the finished product because I was feeding a hungry man, but they were good.

The best thing you can do is to buy fresh tortillas, they make all the difference in the world.

Now for the recipe:

2 lbs. Chicken (cut up)
1/2 Medium Onion
1 Bell Pepper
1/8 cup Soy Sauce
1/8 cup Lime Juice
1 tsp Chili Powder

1. Cut up the onion and bell pepper and place in Zip-Lock with Chicken.
2. Add Soy Sauce, lime juice, and chili powder.
3. Mix well and let sit for up to 30 minutes.
4. Heat oil in skillet.
5. Cook chicken and remove from skillet.
6. Cook remaining vegetables until softend.
7. Return chicken to skillet.
8. Serve immediately.


I hope you enjoy the recipe!

Thursday, June 4, 2009

I'm really turning into a country wife

So, I have been out of the office for the past two days at job sites and running errands. In fact, yesterday things started to die down so I thought, I could maybe get a quick one in about what I've been doing the past few days. I sat down to the computer and wondered why everyone was saying, "see you tomorrow!" Turns out, it was 5:30--quitting time! Of course, I immediately shut down my computer and headed home to get started on my dinner plans!

So here is some of the stuff I was going to post about the past few days:

Softball Sized Hail
Dad, I know you're dying to know about the storms the other day. I mean, I'm pretty sure since I haven't called to tell you anything just terrible, things are ok, and the are! I was driving back from a job site we have northwest of Fort Worth (it's about a 3 hour drive straight through the country) and I knew I was up against storms. Thank the Lord for the people who created the iPhone and all of the very useful applications. I'm not kidding here, I have become so reliant on that little device! The GPS has gotten me out numerous times, and the weather is just so convenient to have right there whenever you need it, unless of course you are somewhere out in the country and you don't have cell phone service.

Every time I made it to a little town I would have just enough service to check the radar and keep myself updated. It was a beautiful show of lightning for most of the drive. I luckily missed the brunt of the storm because of my timing, but I got to watch it from a very short distance. I wish I could have had the opportunity to take pictures of the lightning, if I knew how the heck you do that and if I had my camera. But, unfortunately I don't have a clue how to, nor do I even have a camera with that type of capacity.. all I had was my trusty iPhone and I wasn't about to close out the radar, sorry guys.

So, as I was driving in town, watching the lightning strike the windmills (probably one of the coolest things ever), my dad called me. He wanted to ask how the storms were. Everyone knows my dad and his love for the weather, so I always know that if something were to get bad, I'd probably at least hear about it from him 350 miles away--he's always looking out for his kiddos! :) So he tells me that they are reporting softball sized hail! Softball sized hail? holy cow! I've played softball, and those things are huge when you think about it in the packed ice ball falling from the sky sort of way! At this time, I was about 45 minutes away and my only thought was, oh no! my poor little car!


When I made it back to the office, I was pleased to find that my car made it out unscathed. It turns out the storm snapped many power line poles in half in a town about 10 minutes from here. So what about the softball sized hail? It was in a town about 50-60 miles from here.. every single home there was damaged.. all 452 of them! So my little tahoe made it out ok this time!

New Office Furniture
Few of you have been in my office to see the little bit of renovation we've done as a result of me working here and taking over--funny how you can change your name, but the Kercheval mentality never leaves you.
So anyways, since December we've gotten new carpet (carpet tiles from Interface Flor--they are the only company I would recommend if you are considering tiles, and they do have a very cool residential line), new paint, and now we are slowly getting new furniture for the lobby. All we have ordered so far is one chair and one end table, we will be ordering two more chairs, another end table, and a coffee table. I went to Pier 1 yesterday to get some décor (please note the accent for effect) for the lobby because I am a member of their design concepts--their program for design trade members that gives you 20% off of everything, all the time. I grabbed some pillows, lamps, and accent pieces and came back to get a preview of what the lobby will look like when it's complete.

We still need artwork desperately, but rest assured that is being worked on as we speak. I will show you what it looks like when it's all completed!

..now on to the good stuff..

I took all of these pictures with my iPhone, just so you know.. but I needed proof!

Frying Chicken
I found a great recipe from my newest best friend, the Pioneer Woman and I decided to try it (go to her website for the actual recipe and for better pictures). I have never fried anything before, ever, but Brandon was thoroughly impressed.

I started by soaking the chicken tenderloins in buttermilk (that's right, I'm doing it the right way). ..and yes, that is an Angel Hair Spaghetti box in the background, don't judge me..

Then I rolled them in my seasoned flour

After that I put them in the skillet to fry!

Here's the finished product! Brandon was very impressed, apparently he loves homemade fried chicken, who woulda known?

Well, that's all for right now, I have more to write and more pictures, but I'll save that for another day!

Wednesday, April 15, 2009

Antique Roses and Homecooked Meals

On Monday morning, Bill from my office (probably the sweetest, yet craziest old man) came around the office to all the girls and dropped huge vases filled with pink and red antique roses he cut off of his wife's rose bush. They are beautiful! I thought it was so nice for him to decorate the office with fresh roses! Well, with the roses came ants. All day Monday I was in a never ending war with about 5 ants. When I would see them crawling around my desk, I would flick them but they always seemed to find their way back.

Besides that, the flowers are so pretty and smell wonderful. My favorite part of them is the 4 or 5 buds I still had on mine. This morning I got to watch a full on bud open up to be a precious little dark pink flower. I've never really been that into plants, I always manage to kill them, or worse, leave them hanging on for dear life for months. Such is the case with the rest of the plants I have in my office. I started with one little aloe vera plant in a coffee cup that I inherited from my friend Rebecca who used to have my job. Well, that one little plant turned into 4.. all of which were in this measly little coffee cup. Last summer I was trying to personalize my office a little bit, so I found some primary colored plastic pots in the CEO's office that were empty. Now, these pots are nothing to get excited about, I mean, they are the plastic pots you are supposed to put inside a much prettier ceramic pot, but my little aloe vera plants didn't know any different and loved them just the same.

I separated them all into their own pots and even bought a new plant at wal-mart, I don't know what it's called but it is a little succulous plant that had little bitty yellow flowers all over it when I bought it. I seriously thought I was doing really well and maybe beginning to develop a slight green thumb, little did I know I have the most high maintenance aloe vera in the world! I should just be proud they are all still alive! When I looked up "how to take care of an aloe vera" everything I read said "lots of sun", and "a little but of water." I realized that this is exactly the opposite of what I had been doing--I had the little coffee cup on the farthest point of my desk from the window, and I watered it everyday. When I read this, I changed the location of the plants and placed them by the window, don't worry I closed the blinds in the afternoon, and I watered them about 2 or 3 times a week. All of my poor little plants turned grayish brown and wilted. I moved them back to where they were and began watering them again and the came back to life. My other mystery plant dropped every single one of its little bitty yellow flower (the reason I bought it) all over my desk and they never came back.

About 6 months ago, I moved offices to one in the very center of our building with no windows. The best light my mistreated plants get is from the awful fluorescent bulbs above me--who thought those were a good idea? They are the worst things in the world! Anyway, so all of my plants are holding on and for what I don't know. I've tried to give them away so many times because I feel bad just throwing them out. Well, I still have them and they all look sad, but now with the antique roses, I feel like everything in my office has livened up a little bit! That is a picture of my sweet little bloom I got today! I know you are all jealous of my view of a file cabinet! :)

So one of my goals as a wife, and eventually a mom, is to be able to plant flowers and actually have them survive. I want to make that a hobby.. I just don't think I've made it that far yet in my domestic wife transformation. I will say however, that I am very proud of myself for getting better at one of my other goals, cooking. You see, Brandon absolutely hates eating out, even on the weekends. I came from a family that lately we eat out for every meal--and yes, that includes breakfast most days--and I love it. If Brandon does this for an extended period of time it literally makes him sick, no joke.

So through the process of dating and marrying him, I've learned how cooking really is much healthier and remarkably cheaper. Cooking has always been one of those things that I know about, I mean if you consider having the ability to follow a recipe and have it come out edible as knowledge! What I have really been striving to do is be able to come up with my own dishes, or just know when to put a little more of this and little less of that to make the flavor just pop. Well, I'm getting there! I was so proud of myself last week for not eating out at all (seriously, the last time I ate out was a week and a half ago) that I thought I would come up with some other things to make for this week. I think the biggest learning curve comes from trying to come up with new things to make with only the things I have at home, rather than going to get 1 or 2 things at the grocery store.

Monday night, I made this amazing chicken basil pasta. I got the gist of the recipe from a website, but the special added touches came from yours truly. The boys LOVED it! (We had Bryan and Lauren come over for dinner). I think this is now my favorite dish that I've made so far! Last night I totally just came up with this on my own, and while it was a little on the spicy side, it was still good! I marinated some chicken over night in this Caribbean jerk marinade, then I pan seared the chicken, added more marinade and some steamed broccoli, mixed it all together and topped some rice with my Asian-looking concoction. It was pretty good for deciding how to make that chicken 30 minutes before Brandon got home.

Who knows what I will make for dinner tonight, or even if I will make anything, all I care about is if I get to eat! :)